Murukku
- By admin_maria
- October 2, 2016
- 2 Comments
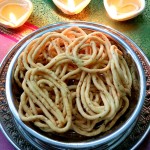
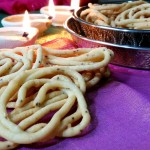
Murukku is one of most famous snack that we love to have, especially during Deepavali. In Malaysia, it became everyone’s favorite savory snack. It’s crispy in texture with well balanced spices and flavors. The secret for soft, crispy and crunchy murukku is depending on how soft the dough is. If the dough is dry and firm, the harder the murruku will be. This technique is applied for both home prepared murruku flour or store bought murruku flour. Here, I have prepared recipe for homemade murruku flour.
Recipe serves : 30 – 35pcs (or more)
Ingredients :
- 2 Cups pure rice flour
- 1/4 Cups roasted urad dhal flour (varutha ullutha maavu)
- 1.5 Tablespoon butter/margarine
- 2 Teaspoon sesame seeds (dry roasted)
- 1.5 Teaspoon ommam/carom seeds (dry roasted)
- 1/2 Teaspoon cumin seeds (dry roasted & pounded)
- 1 to 1.5 Teaspoon salt
- 1 & 1/4 Cup hot water (or add additional as needed)
- Oil for frying purpose
Let’s make the murukku :
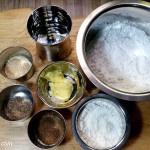
Prepare the required ingredients. Store bought pure rice flour is suitable for this murukku. Use only roasted urad dhal flour. Adding some santan (coconut milk) is based on individual preferences.
Dry roast the cumin seeds, then crush/pound the roasted cumin seeds (to release the aroma from the seeds).
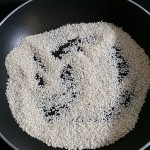
In a pan, dry roast the spices one by one, sesame seeds and ommam (carom seeds).
Dry roast in a pan just for 1-2 minutes (low heat).
In a mixing bowl, add in all the dry ingredient. Rice flour, roasted urad dhal flour, crushed cumin seeds, roasted sesame seeds, ommam seeds and salt. Use hand to mix the ingredients together and add in the butter. Press the butter and make them as crumbs together with other dry ingredients.
In a pot, add some water (about 1.5 cup). Heat it up just for a while. Just warm it up, do not have to boil the water. Off the heat and remove the pot from heat.
Note : If the water is too hot (boiling hot), the flour will be overcooked while we mixing them in the bowl itself (before frying step). Which might make the murukku looks over sized (fluffy) after frying.
Slowly add in the hot water (*medium hot only). Use spatula or spoon to do the mixing job easier. The water level used should be in between 1 cup or little more. It might look wet (sticky) at this moment. It’s fine.
Note : The key for crispy and crunchy mukuku is depend on how soft (sticky) is the flour after mixed with hot water at this step. If accidentally mixed too much of water, do not worry, just add in some additional rice flour and urad dhal flour and balance up texture.
If you are making murukku alone at home, you may squeeze out the murukku dough on small pieces of paper as in picture . Do few batches, then start frying. It’s easy to control the frying task in this way. This is how I start learn to do murukku alone, by myself.
Or you may used the large scoop as in picture, then directly squeeze out the murukku on it, and start frying. We might need more than 1 person in the kitchen. 1 person to press the shapes and another person to do the frying job.
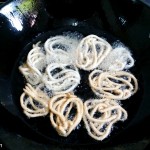
Use enough oil, with medium heat to fry the murukku. Once the oil bubble on the murukku is getting less, remove each murukku one by one and place them in a tray lined with kitchen tissue.
Note : Do not keep the heat too low, the murukku will cook for too long and absorb too much oil. Maintain the heat to medium, so that they are fried and cooked evenly.
Let them completely cooled down. Then store them in a airtight container.
Note : Sample of pure rice flour, which I used in this recipe. You may use any brand of Pure Rice Flour available at the shop. But ensure it is Pure Rice Flour only. Check out at the ingredients details on the packet.





Tq for sharing this recipe.will surely try this Deepavali
Hi Ms Nalini,
Sure, give a try. You will like it.
Follow up my other recipe updates via
https://www.facebook.com/cookingsbymaria/?ref=page_internal
Thsnk.
Maria MK